FE dev/Svelte Guide
Svelte Guide - Logic
gmta
2022. 1. 21. 17:44
반응형
if blocks
- HTML은 조건문과 반복문과 같은 논리적인 표현식을 가지지 않습니다. Svelte 도 그렇습니다.
- 몇몇 마크업을 조건에따라 렌더링 하기 위해서 if 블록 안에서 감싸줍니다.
- 버튼 클릭을 통해서 컴포넌트의 상태를 업데이트 할 수 있습니다.
<script>
	let user = { loggedIn: false };

	function toggle() {
		user.loggedIn = !user.loggedIn;
	}
</script>

{#if user.loggedIn}
	<button on:click={toggle}>
		Log out
	</button>
{/if}

{#if !user.loggedIn}
	<button on:click={toggle}>
		Log in
	</button>
{/if}
Else blocks
- 토글형식으로 true/false 형식으로 상호 배타적인 경우 다른 블록을 사용하여 구성요소를 단순화 할 수 있습니다.
- Else blocks 을 사용시 코드가 간결해집니다.
<script>
	let user = { loggedIn: false };

	function toggle() {
		user.loggedIn = !user.loggedIn;
	}
</script>

{#if user.loggedIn}
	<button on:click={toggle}>
		Log out
	</button>
{:else}
	<button on:click={toggle}>
		Log in
	</button>
{/if}
Else-if blocks
- 많은 수의 조건은 else if 를 함께 사용할 수 있습니다.
<script>
	let x = 7;
</script>

{#if x > 10}
	<p>{x} is greater than 10</p>
{:else if 5 > x}
	<p>{x} is less than 5</p>
{:else}
	<p>{x} is between 5 and 10</p>
{/if}
Each blocks
- 반복적인 작업을 하고 싶을때는 eack block 를 사용하면 됩니다.
<script>
	let cats = [
		{ id: 'J---aiyznGQ', name: 'Keyboard Cat' },
		{ id: 'z_AbfPXTKms', name: 'Maru' },
		{ id: 'OUtn3pvWmpg', name: 'Henri The Existential Cat' }
	];
</script>

<h1>The Famous Cats of YouTube</h1>

<ul>
	{#each cats as { id, name }, i}
		<li><a target="_blank" href="https://www.youtube.com/watch?v={id}">
			{i + 1}: {name}
		</a></li>
	{/each}
</ul>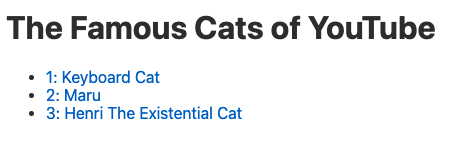
Keyed each blocks [이 부분은 잘 이해가 가지 않습니다...]
- 기본적으로 each block 값을 수정할 때, block 마지막에서 items 을 추가하거나 제거 할 것 입니다. 그리고 변화된 값을 업데이트 할 것 입니다.
// App.svelte

<script>
	import Thing from './Thing.svelte';

	let things = [
		{ id: 1, name: 'apple' },
		{ id: 2, name: 'banana' },
		{ id: 3, name: 'carrot' },
		{ id: 4, name: 'doughnut' },
		{ id: 5, name: 'egg' },
	];

	function handleClick() {
		things = things.slice(1);
	}
</script>

<button on:click={handleClick}>
	Remove first thing
</button>

{#each things as thing (thing.id) }
	<Thing name={thing.name}/>
{/each}
// Thing.svelte
<script>
const emojis = {
apple: "🍎",
banana: "🍌",
carrot: "🥕",
doughnut: "🍩",
egg: "🥚"
}
// the name is updated whenever the prop value changes...
export let name;
// ...but the "emoji" variable is fixed upon initialisation of the component
const emoji = emojis[name];
</script>
<p>
<span>The emoji for { name } is { emoji }</span>
</p>
<style>
p {
margin: 0.8em 0;
}
span {
display: inline-block;
padding: 0.2em 1em 0.3em;
text-align: center;
border-radius: 0.2em;
background-color: #FFDFD3;
}
</style>
Await blocks
- 대부분의 웹 어플리케이션은 특정 지점에서 동기적으로 데이터를 처리합니다.
- 스벨트는 마크업에서 직접적으로 promises의 값을 await 하는 것을 쉽게 해줍니다.
- promise 가 거부된것을 안다면 catch block 에서 생략할 수 있습니다.
- promises 가 resolves 될 때 까지 어떤것도 보여주기를 원치 않으면 첫 번째 block을 생략가능합니다.
<script>
	async function getRandomNumber() {
		const res = await fetch(`/tutorial/random-number`);
		const text = await res.text();

		if (res.ok) {
			return text;
		} else {
			throw new Error(text);
		}
	}

	let promise = getRandomNumber();

	function handleClick() {
		promise = getRandomNumber();
	}
</script>

<button on:click={handleClick}>
	generate random number
</button>

{#await promise}
	<p>...waiting</p>
{:then number}
	<p>The number is {number}</p>
{:catch error}
	<p style="color: red">{error.message}</p>
{/await}